
In the last section, we introduced the Bluefish Editor. In this article, we will use the Bluefish Editor to add Heading and Paragraph tags to a web page. But first, we will take a closer look at the anatomy of an HTML tag.
Anatomy of a Simple HTML Tag
The Bluefish Tag tool will automatically insert the correct tag syntax. However, it is useful having a basic understanding of HTML tags. They tend to look like the following:
<tagname>Content</tagname>
Note the slanting line in the ending tag.
Here are some examples of simple tags:
<p>This is my paragraph</p>
<li>This is my list item</li>
The Two Most Important HTML Tags
There are more than one hundred HTML tags. But most of the time, we will use the following two common tags:
Heading Tags
Every HTML doocument should begin with a heading tag because Search Engines will look for the heading tag in order to categorize the web page. HTML defines six special types of paragraphs for use as structural headings on a web page. The six are <h1> through <h6>. The intent of these tags is to define divisions and subdivisions in the document, similar to chapters, sections or topics. Headings form the structure of your web page and your entire website.
Paragraph tags
Every paragraph should begin with an opening <p> tag and end with a closing </p> tag.
Side by Side Editing
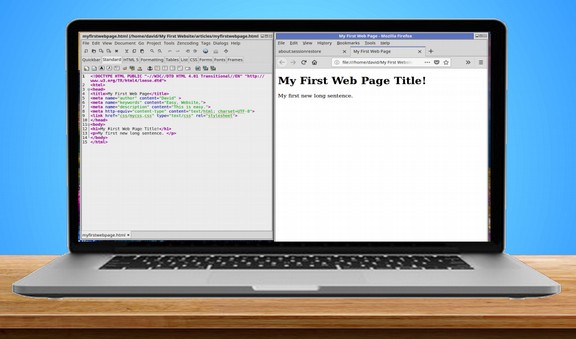
Now that we have a better understanding of the Bluefish Editor, we are almost ready to create our first web page. But first, resize the Bluefish Editor so that it only takes up the left half of the screen. Then run Firefox in the right half of the screen. Our goal is to create the document with Bluefish and then view the result with Firefox. Here is what the end result should look like on our desktop:
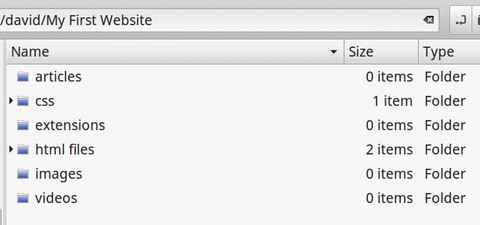
Create Your Website Root Folder
Open Your File Manager and create a folder called My First Website. Create folders in your Root folder for your website articles, css, extensions, html_files, images and videos. Your Root folder will look like the following:
Create Your First Bluefish Web Page
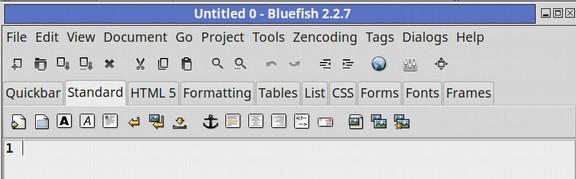
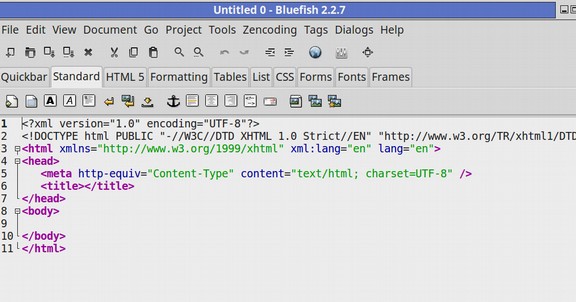
Open Bluefish and hopefully, you will see our simplified editor looking like the following:
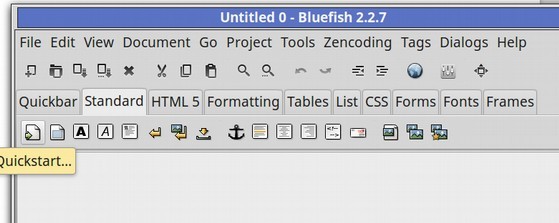
Click on the Quick Start Icon below the Quickbar tab:
For DTD, use the drop down arrow to select HTML 4 provisional.
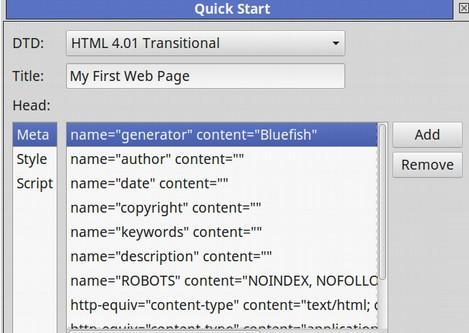
Type in the title: My First Web Page
Before we click OK, hold down the control tab on your keyboard and select and remove all of the parameters except author, keywords, description and UTF8. Click Remove, then OK. Here is the head of our HTML document.
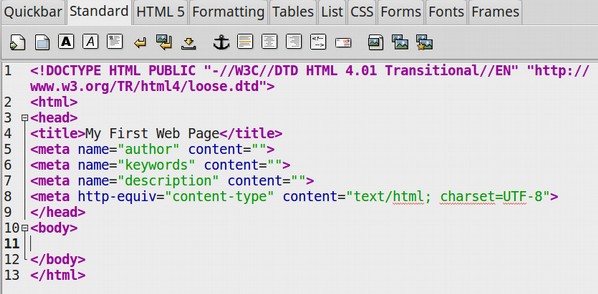
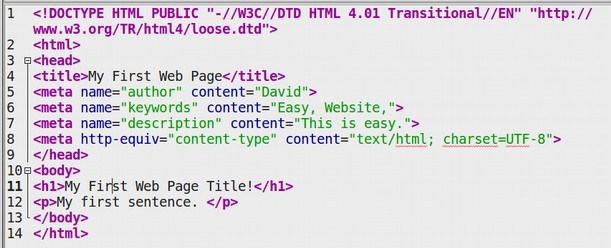
Then, in the head of the document, type in your name for the author. Type in Easy, Website, for the Key Words and This is easy. For the description. Here is what your screen should now look like:

Click File Save and Save the document to your website root folder inside of your articles folder naming the file, My First Web Page.
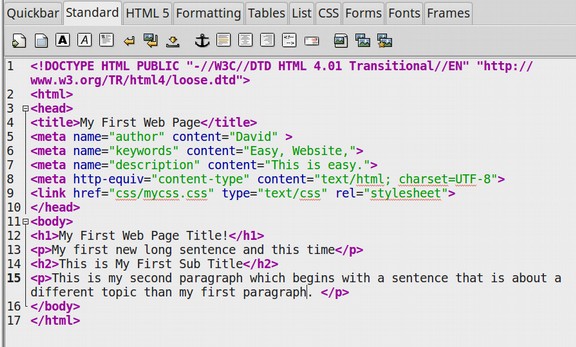
Now let’s add a Heading to our web page. Between the body tags, type My First Web Page Title! Then select this sentence and click Tags in the Top Menu and click on Headings, then the H1 tag.
Click Enter to Start a new line. Type in My first sentence. Then select the sentence and click on the Tags Menu Item. Click Format, General, then select Paragraph. This is what our screen should now look like:
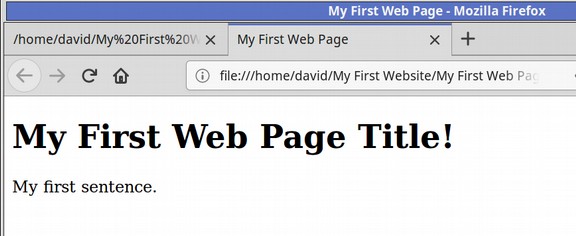
Click File Save and save your document in your website root folder HTML documents sub folder. Then open your file manager, open your website folder and open your file with Firefox web browser.
You can also reach this same screen directly from Bluefish by clicking on Tools, Firefox in the top Bluefish menu. You can also reach this same screen by clicking on the blue circle in the Bluefish Quick Launch row of icons.
Congratulations, you have made your first real web page!
Add a Sub Heading with the H2 tag
We will use the H1 tag only once on each web page – at the very beginning to indicate the topic of the page so that search engines know what the page is about. As each of our web pages is about 8 to 10 pages of pages of text in our Libre Writer Menu (actually 5 pages of text and 5 pages of images), we can break up the document into sections by using 3 to 5 Sub Headings with H2 tags. To create a sub heading, and another line of text, then click on Tags, Headings and click the H2 tag.
Add a New Paragraph Tag below Each Heading Tag
Below the H2 closing tag, type another sentence – then select it and click Tags in the top menu, then General to add another paragraph tag. Here is what our Bluefish Workspace looks like now:
Before we can view these additions with our Firefox web browser, we need to click File Save. Then click on either Tools, Firefox in the Top Menu or the Blue Globe in the Quick Launch icons to bring up Firefox (if it is not already open).
Click on the Refresh button in Firefox to see the end result of adding a sub heading. Here is what it should look like:
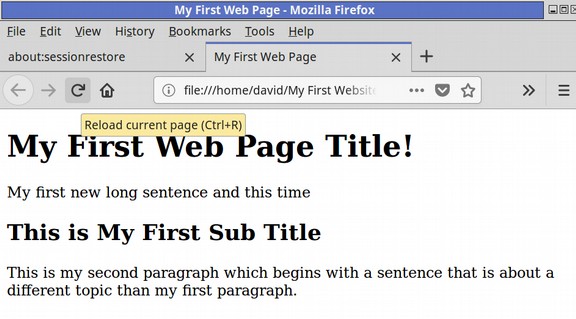
I have hovered my pointer over the Refresh button (just left of the little house) to show you where the refresh button is in Firefox. Firefox will display “Reload the current page.”
Customize the Quick Bar Tab
By default, there are no Quick Launch icons in the Quick Bar Tab. Click on the Quickbar tab (to the left of the Standard tab) to see the empty bar:

We can add any HTML Quick Launch icons to this bar to help us add HTML tags faster. We first need to find the tag we want somewhere in one of the other tabs, then right click on it and select Add to Quick Bar. We will begin by adding the Quickstart icon to the Quickbar. Click on the Standard tab. Then right click on the Quickstart icon. This is what your screen will look like:

Next add the H1 tag. This is strangely under the Fonts tab. Click on the Fonts tab. Then right click on the H1 tag. Click Add to Quickbar. Next, click on the H2 tag and add it to the Quickbar. Then add the H3 tag to the Quickbar. Finally, click on the Standard tab and find the Paragraph tag. Right click to add the Paragraph tag to the Quickbar. This is what your Quickbar row will now look like:

Leave your Bluefish Editor set for the Quickbar and you can add Heading and Paragraph tags without having to find them in the top menu. You can always add more icons to the Quickbar – but try not to add too many. You can also delete icons from the Quickbar simply by right clicking on them and clicking Remove from Quickbar.
Create a New File (instead of using the Quick Start icon and then)
Instead of using the Quick Start icon and then saving the file with Save or Save As, we can click on File, New From Template which allows us to us choose a premade template. When you launch a new document from the Bluefish file menu, if you choose File, New From Template, Bluefish will give you the option of choosing between a few pre-built program templates. Here are our 5 template options:
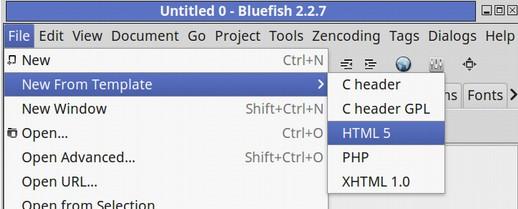
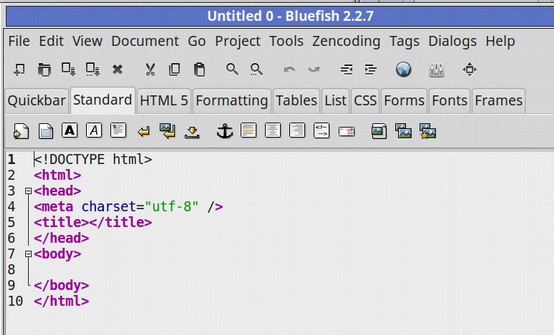
Unfortunately, all of these 5 options lack some of the options found in the Quick Start icon. Here is the HTML 5 Template:
Here is the XHTML template:
We need to add in the Author, Key Words and Description ourselves with either of these template. These can be easily added with the Quick Start icon. But that defeats the point of using the template method. So we will not use the Template method and create all new pages using the Quick Start Icon.
What’s Next?
This concludes our section on Heading and Paragraph tags. In the next section, we will use Table tags to display data, static page layouts and feature boxes.